
Microsoft Cloud App Security (MCAS) is Microsoft’s CASB (cloud access security broker). It is a service that sits between your cloud app consumers and the cloud apps they are using and acts as a security and compliance enforcement point. Before any analysis can happen or policies can be applied, the service needs connection data to understand what services are used by whom. MCAS offers a variety of options to get this data into the service such as using service connectors, log forwarders or custom uploads. In this post I will focus on custom log data that comes from a device that is not natively supported by MCAS.
Does this sound familiar? You use a cloud service that offers connections into various other solutions … but yours is not on the list. This might also happen when using MCAS, even if it supports many integrations by default. But no worries, it is flexible enough to hopefully address your needs because it offers a custom log parser to upload custom logs. But because the log file is not sent from a known solution, the format, column structure etc. will be unknown to MCAS. So it’s up to you to translate this into something meaningful. Let’s have a look based on a simple-to-follow example.
The Log File
I manually created a CSV-log file from a fictitious device in Notepad. It looks like this.

As you can see I used some basic columns for connectivity details. As “Destination” I used a well-known public IP address range (147.243.0.0/16) from Azure Frontdoor. Because this IP range is known by MCAS, it will later be translated into a meaningful and easy-to-understand application.
Upload the Log File
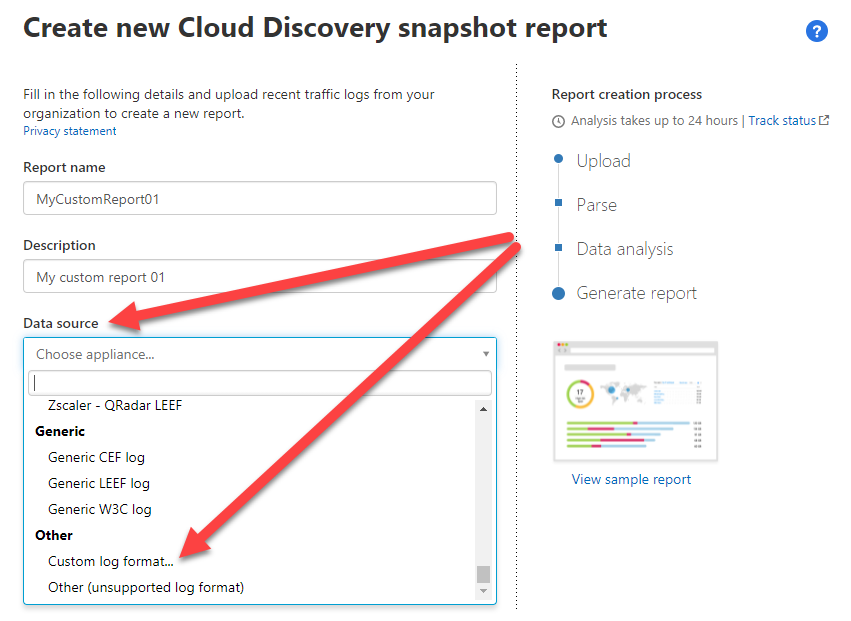
Now it’s time to upload the log file to MCAS. The simplest way to do this it through the creation of a new snapshot report.

The wizard offers a variety of devices that are well-known to MCAS. If your device is on the list: Bingo! MCAS does all the hard work to translate the log columns for you. If your device is not on the list, select “Custom log format”. This is what I will do in this example.
Now it’s time to map the log file columns so that MCAS can understand and map them accordingly. Some mappings are mandatory because without those, MCAS could not translate the log rows into meaningful information. Some are optional, but the more mappings you configure, the more valuable the information will be for your organization.
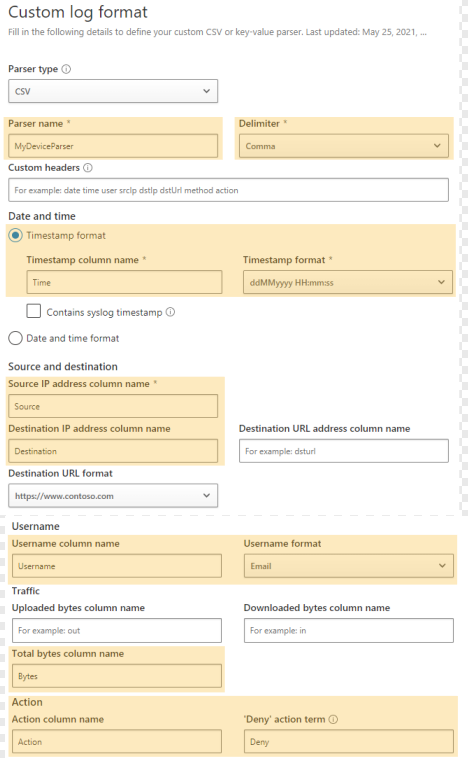
- Parser Name -> Name for the custom parter
- Delimiter -> Delimiter character
- Timestamp -> Select proper format from log file
- Source/Destination IP addresses
- Username column & format
- Traffic details
- Action column & deny keyword for denied connections
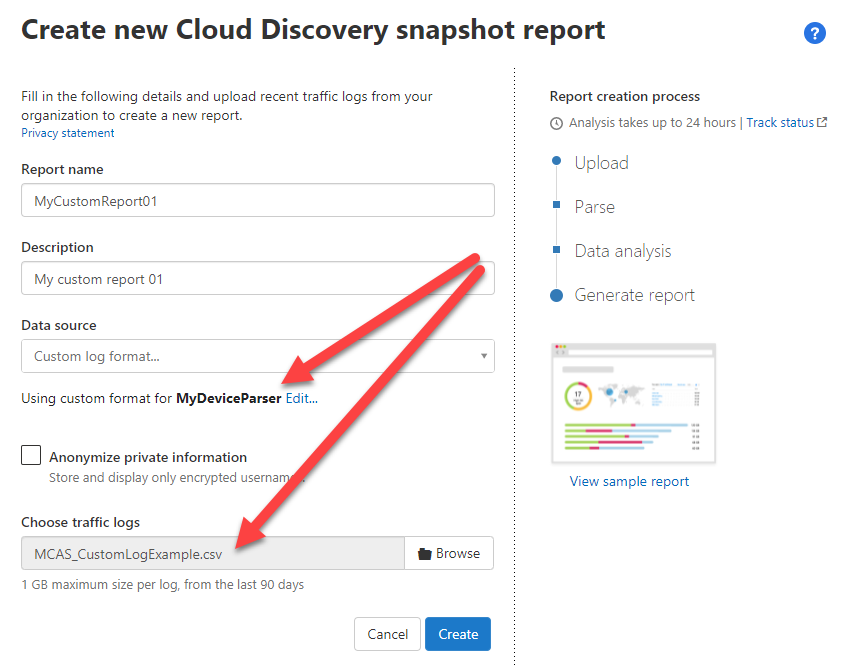
Now as the parser configuration has been completed, the log file(s) can be selected and the report can be created.
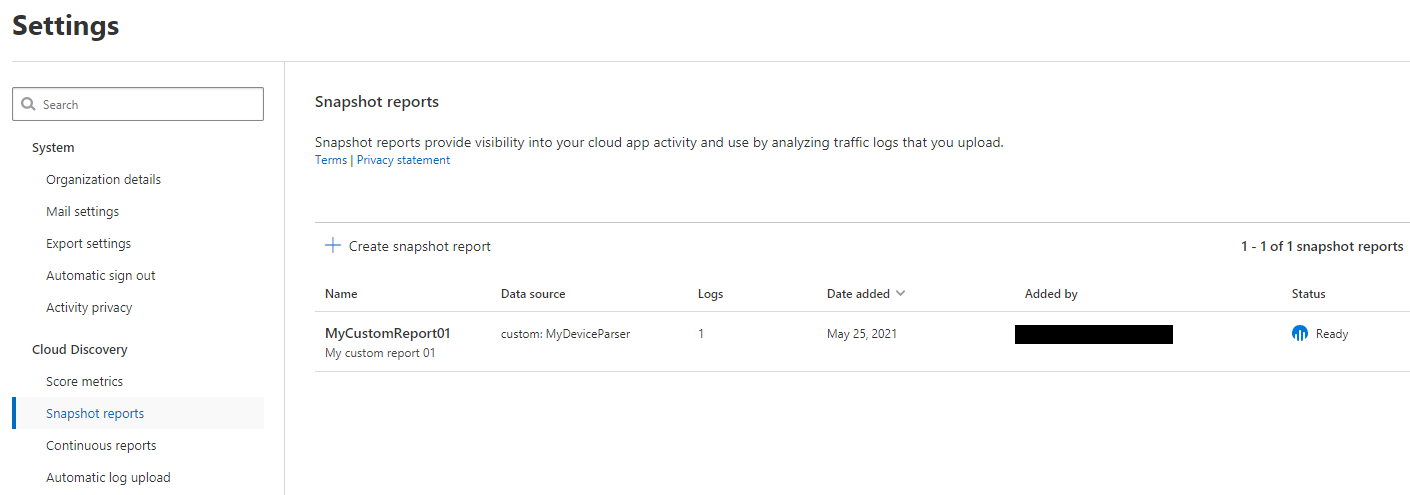
Depending on the size of the log file(s), this might take a while. You can track the process in the settings area.
- Processing -> Still processing the reports
- Failed -> Something went wrong, normally because of formatting or mapping issues
- Ready -> Report is ready to be used
If you open the report, it will show the details of the connections from the log file(s) in the same style as any other imported data.
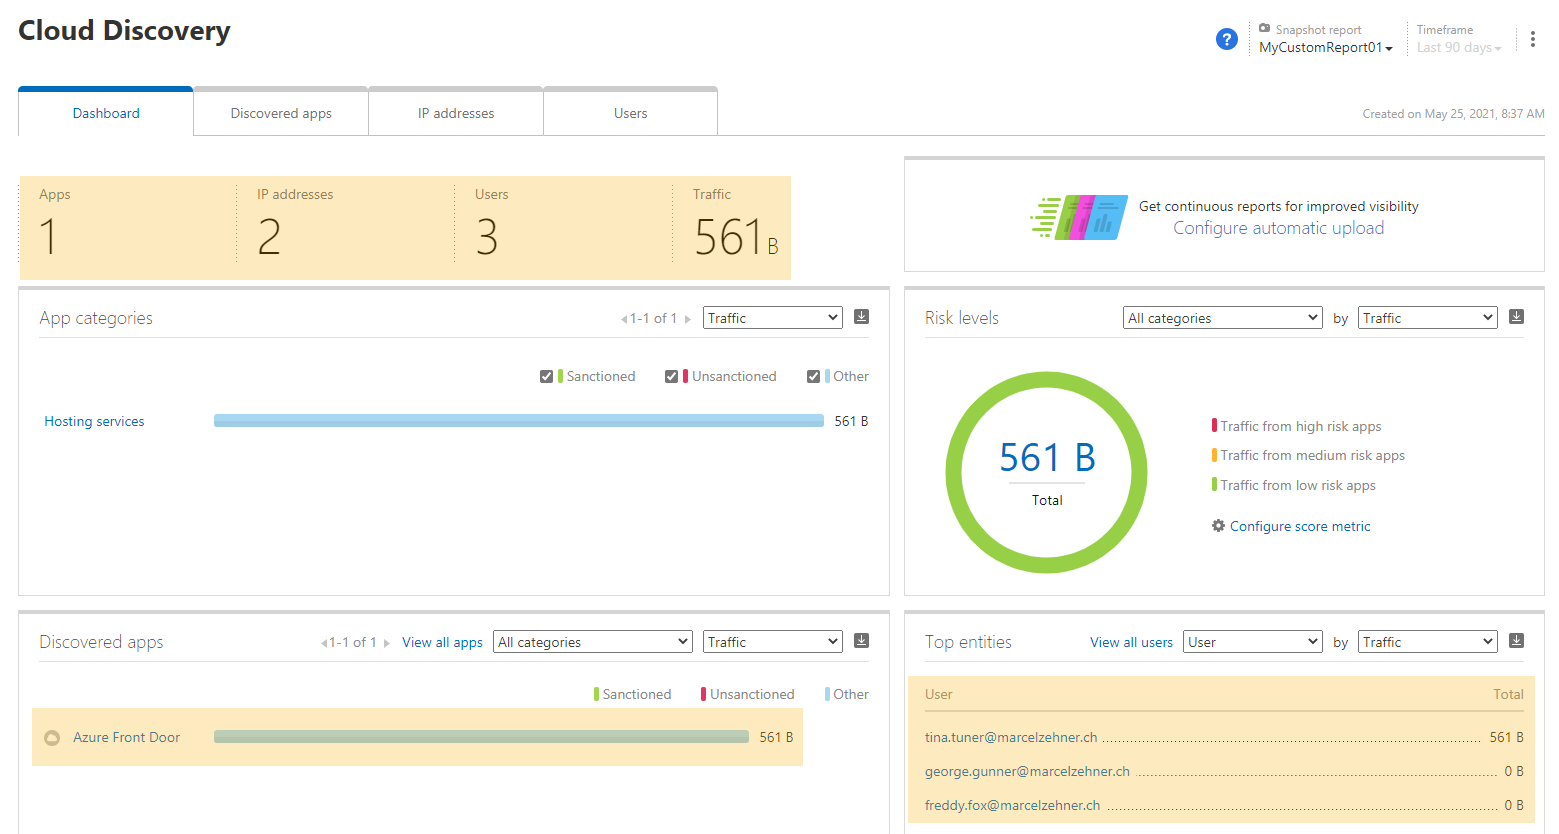
As you can see, all data from the log file has been visualized. The destination IP addresses have been translated from the MCAS app catalog to understandable application names (Azure Front Door). And with that we are done!
Remember: For now this is just a static one-time upload. Depending on your needs this might not be enough. Of course MCAS also support the automatic upload by using a log collector. That will be the topic of one of the next posts. Stay tuned!
Cheers
Marcel


