
In 2019, Hashicorp announced their very own Terraform Cloud. It allows you to manage state remotely, allows the remote execution of plan, apply and destroy tasks and supports integration with common version control systems to manage your code (and some more features). In this post I will demonstrate the basic setup of the Terraform Cloud for a flexible scenario with two workspaces that are totally managed remotely.
When the Terraform Cloud was announced a while ago, I wrote a blog post how it can be used as a remote backend to store Terraform state. In the post you are reading now I will go a little bit deeper and dive into more details. The good thing is, that you can create your own account for the Terraform Cloud immediately and start playing with it. Lots of features for small teams are available for free.
Scenario
In this post I will use a simple Terraform configuration to deploy an Azure Resource Group that contains one Storage Account. I will not only use Terraform Cloud as a remote backend, but also use two workspaces. Those allow me to deploy the same code into two different environments.
Preparation
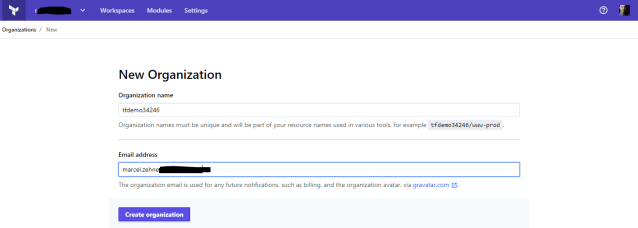
The Terraform Cloud can be accessed by browsing to terraform.io. Create an account and you are ready to go. You can have one or multiple organizations to manage your states, runs, variables etc., I will create a new organization just for this scenario. That way we can start with a clean environment.
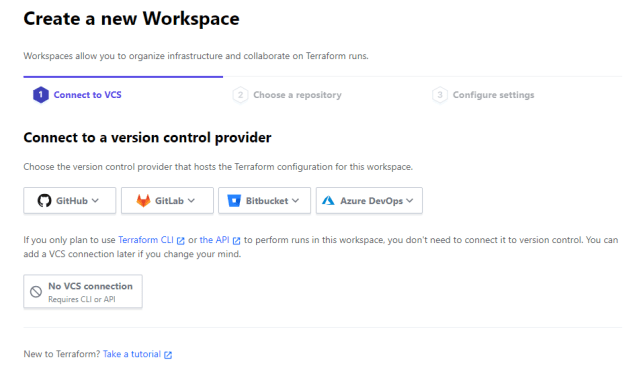
During the organization creation process the platform also creates a workspace. One workspace is always needed. As you can see in the following screenshot, it supports different version control providers, but in this scenario I want to focus on remote state and runs, so I just select “No VCS connection”.
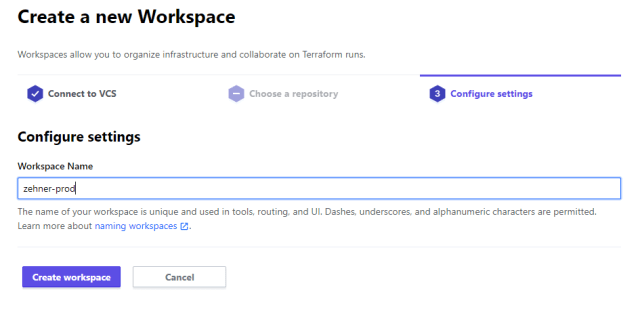
The workspace needs a name. Because I will create additional workspaces later, I will use the same suffix for every single workspace. This first workspace is used to manage state for my prod environment, so I will name it “prefix-prod”.
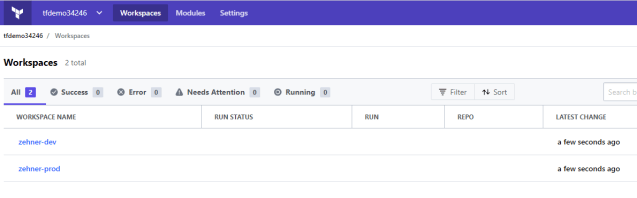
Once the workspace is created, I add another one to manage my dev environment in the same organization. Remember to use the same prefix.
Every workspace has several settings you need to analyze and configure properly for your needs.
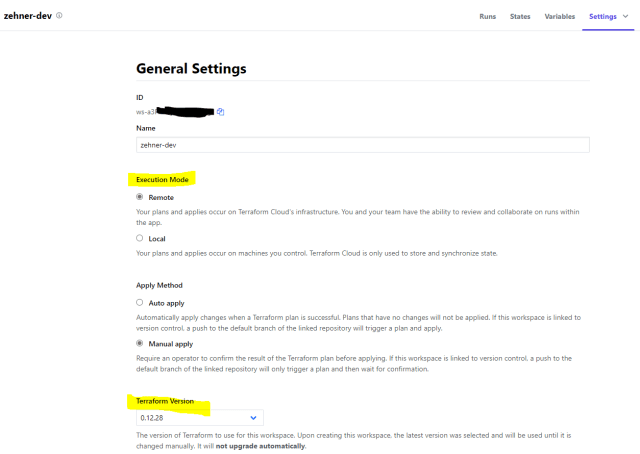
- Execution Mode > This defines if Terraform actions that use this backend later will run locally (e.g. on your notebook) or remotely (on the Terraform cloud). I will use remote here because then I have all my runs centrally logged. This is helpful for later audits and insights.
- Terraform Version > This allows you to select the Terraform version you want to use. This is only available when you execute Terraform remotely and gives you some additional control. Once selected, it’s up to you if you want to switch to a newer version later.
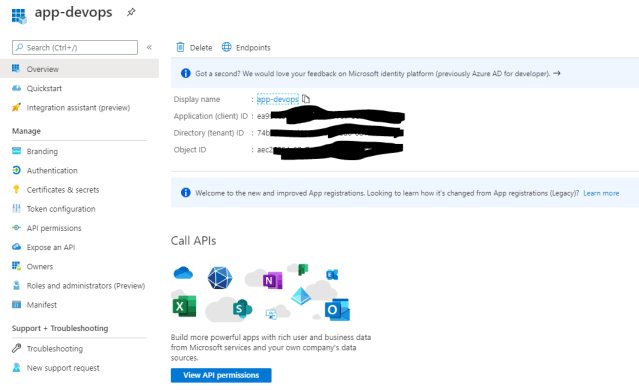
Another thing we now need to configure is the connection to the Azure environment. I selected to run all commands “remotely” in the Terraform Cloud. That means, that the workers who execute the process will need to make a connection to my Azure environment and need connection details for that. In this example here I already created a service principal (Azure AD application) and gave it permissions to deploy resources to two of my subscriptions.
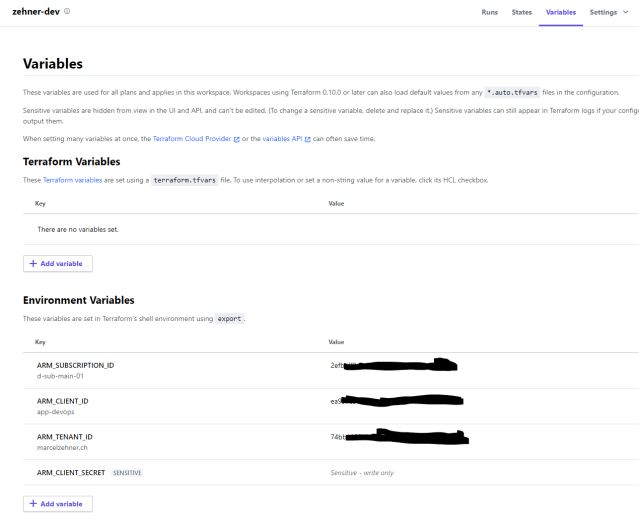
For both my workspaces I need to configure these 4 variables.
- ARM_TENANT_ID > Id of my tenant
- ARM_CLIENT_ID > Id of my application that I created in Azure AD
- ARM_CLIENT_SECRET > Client secret of my application
- ARM_SUBSCRIPTION_ID > Id of the Azure subscription this deployment should go to
In this environment, the dev and prod environment are living in the same tenant, but I use different subscriptions for them. So 3 of the values are the same (of course you could use different service principals for the environments if needed). The subscription id’s are different for the 2 workspaces.
Now there is one last thing to prepare. I prepare a Terraform variable with a pre-set value. The variable name is “environment” and the values are either “d” for the dev workspace and “p” for the production workspace. You will see in a minute what those are used for.
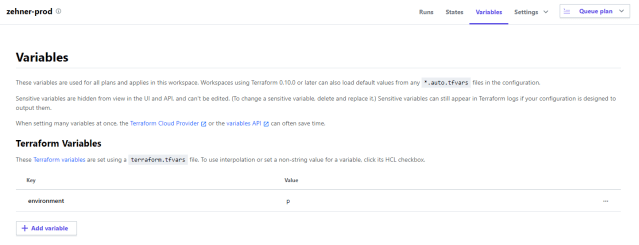
And with that we should have everything ready in the Terraform Cloud platform.
The Configuration File
Let’s now have a look at the configuration file. As always, I use very simple example that can be easily followed.
variable "environment" {
  type        = string
  description = "Environment"
}

terraform {
  backend "remote" {
    hostname              = "app.terraform.io"
    organization          = "tfdemo34246"
    workspaces {
      prefix              = "zehner-"
    }
  }
}

provider "azurerm" {
    features{}
}

resource "azurerm_resource_group" "rgr1" {
  name                     = "${var.environment}-rgr-tfdemo-01"
  location                 = "West Europe"
}

resource "azurerm_storage_account" "storageaccount1" {
  name                     = "${var.environment}stotfdemo0000001"
  resource_group_name      = azurerm_resource_group.rgr1.name
  location                 = azurerm_resource_group.rgr1.location
  account_kind             = "StorageV2"
  account_tier             = "Standard"
  account_replication_type = "LRS"
  is_hns_enabled           = "false"
}
- Variable > Because I want to release the same code into two different environments, I will use a variable. The value is a simple prefix that will be “p” for production and “d” for dev. It will be used in the names of my Resource Group and Storage Account. Remember, I set that variable value in the two workspaces? That value will be used to construct the full name later.
- Terraform > Here I configure the backend and specify that I want to use the Terraform cloud (app.terraform.io). I specify the organization name and the prefix of my workspaces. With that, the workspaces will be automatically discovered.
- Resource > Finally there are my two resources. This is pretty much standard. I use the variable value (“p” or “d”) to construct the full name of the resource.
Connect to the Terraform Cloud
I am managing this configuration on my notebook that does not know anything about the Terraform Cloud yet. When applying this configuration, Terraform will try to reach the backend (Terraform Cloud) and needs to authenticate. For that I can either add a token value into my configuration file (not used in this scenario) or store it in a local file on my notebook. The process is simplified when you run this command.
terraform login
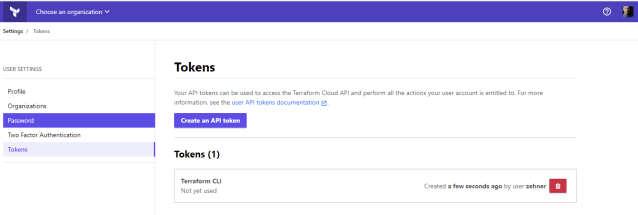
This connects a browser session to the Terraform Cloud and (after a successful login) creates an API token for your account. This is a personal token for your own account. Give is a meaningful name.

It will show the created token value, ask you to copy it and then paste it into the command window to finish the “terraform login” process. This will store the API token value is a local file (unencrypted, take care!). After everything completes successfully, you should see the personal token on your account.
You can also use teams tokens instead of personal tokens, but I will not cover that in this blog post.
Now everything is ready to kickoff the Terraform process.
Go, go, go!
Let’s now start the regular process. This is straightforward.
terraform init
terraform plan
terraform apply
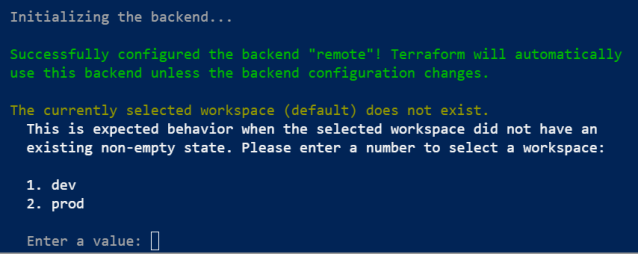
This will initialize the backend, then plan and apply the configuration. Because of the configuration file, Terraform will discover that there are 2 workspaces that match our prefix and will therefore ask, which ones we want to use. For now it’s dev (1).
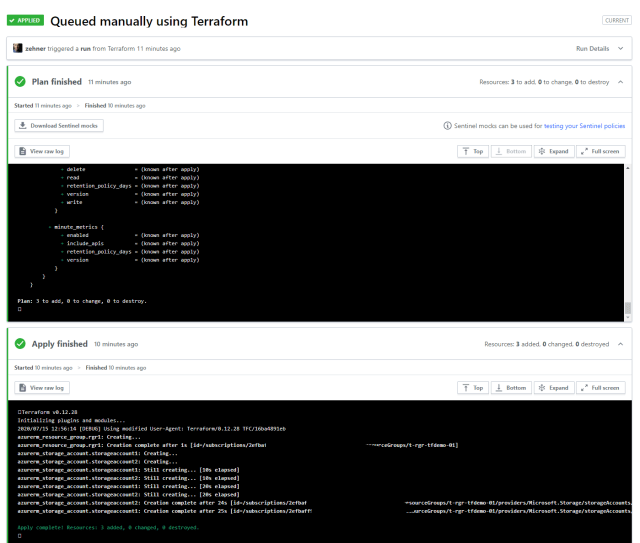
After selecting the dev workspace, everything else runs as normal – just not on your box but in the Terraform backend. “terraform plan” runs in the backend and delivers the results back to your box. The same is true for “terraform apply”. In the Terraform Cloud workspace you can now see and analyze the runs.
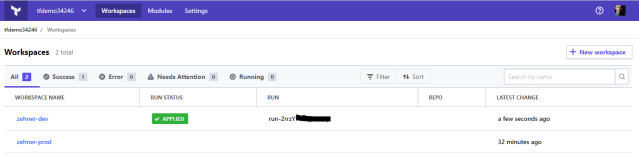
Diving into a workspace you will see all previous and current runs with all the details you are familiar with from your local runs. The outputs are the same as the ones shown on your local box. But here they are auditable in a central place.
Details of Terraform state are also visible. This also includes a history and (simple) change tracking.
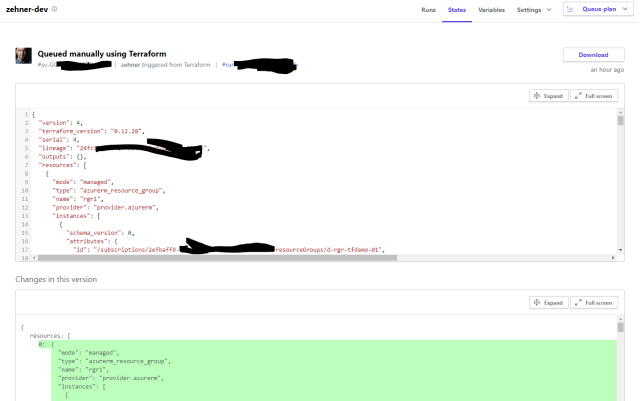
If you want to work with state you can still use the regular commands, even if state data is stored remotely.
terraform show
terraform state list
Once everything is deployed and you are ready for releasing to the production environment you can now just change the workspace. If you are unsure about the name of your workspaces, you can list them first.
terraform workspace list
terraform workspace select prod
After that you work with the exact same code, but the Terraform Cloud will use a separate workspace and separate state to manage it. So running “terraform plan” will result in 2 new resources that will be created – but this time in the production environment (which is just another subscription).
That’s it. I will probably write another post or two for some more advanced scenarios soon. So stay tuned!
Cheers,
Marcel


